Posts

Showing posts from 2016

Getting started with Oracle SOA Cloud Service Final Part 3: Configure Oracle SOA Cloud Service Instance

Image
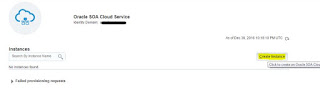
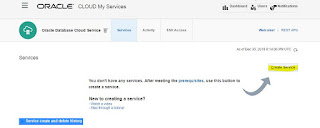
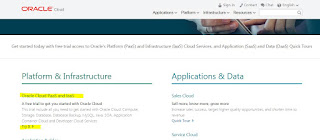
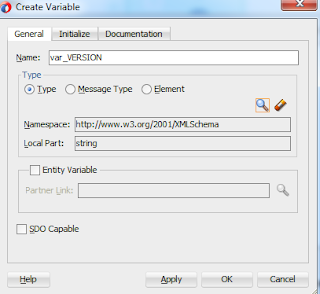
In the Final post of this series, we will explore how to Configure Oracle SOA Cloud Service Instance. We will be using the configuration details of Oracle Storage Container and Oracle Database Service Instance, created in part1 and part2. Follow the below steps to Configure Oracle SOA Cloud Service Instance: 1. Login to My Service Cloud Account. 2. Click on the Menu -> Oracle SOA Cloud Service 3. Click on Create Instance button 4. Oracle SOA cloud provide multiple options to create the SOA instance i.e. whether we just need Service Bus Instance/SOA instance/Service Bus + SOA Instances etc. For this demo, I selected Service Bus + SOA Instance, click Next 5. Select the version i.e 12.1.3 or 12.2.1 As I am working on 12.1.3, I selected 12.1.3 version. and click Next. 6. Next, we need to enter Instance Details Instance Configuration: Enter the Instance Name, Cluster Size Compute Size i.e. 1 or more manage servers Weblogic Administrat

Getting started with Oracle SOA Cloud Service Part 2: Configure Oracle Database Cloud Service Instance

Image
In this Post we cover the steps to setup the Oracle Database cloud service instance. The Oracle Database Cloud Service instance is like any normal Oracle Database instance that is accessible and managed over a cloud. Note: For Oracle SOA cloud service we need to create an Oracle Database Cloud Service with both Cloud Storage and Local Storage backup configuration Follow the below steps to Configure Oracle Database Cloud Service Instance: 1. Log in to your Trial My Services Account 2. From Menu on Left Side, click on Oracle Database Cloud Service 3. Click on Create Service Button 4. It will ask to either upload the SSH key or generate the new Key. Make sure you save the SSH key as it is needed to connect later. 5. Next, enter the service name, select the Software Release Version and click Next 6. Next, Select the Compute Shape i.e. how many CPU's and RAM is needed. Since this is a trial I selected 2 CPU with 15GB RAM, which I feel is

Getting started with Oracle SOA Cloud Service Part 1: Oracle Storage Cloud Service

Image
In this Post series, we will cover the steps to configure Oracle SOA Cloud Service. Firstly, I signed up for the Oracle Cloud Free Trial Account. The trail account give us 1 month free usage for Oracle Cloud Services. To Sign Up, follow the below basic steps: https://cloud.oracle.com Click on Try It Fill in the required details and submit the trail request. If the validation goes through, you should get the welcome email which will have the My account details and My Services Details. Below are the high steps required to configure Oracle SOA Cloud Service Step 1: Configure the container in Oracle Storage Cloud Service Step 2: Configure Oracle Database Cloud Service Instance Step 3: Configure Oracle SOA Cloud Service Instance Step 1: Configure the container in Oracle Storage Cloud Service Pre-requisite for Oracle SOA Cloud service is to have the Container Details at the time of creating the SOA cloud Instance. Follow the below Steps to create the conta

Encrypt Sensitive Data in Oracle SOA 12c

Image
In this post we will explore the option to handle the sensitive data in SOA composite. For example, Consider a scenario for creating the employee record which has SSN as one of the element. If we do not apply the encryption for this sensitive data, then we might risk compliance issues as this data might be available in Custom Logs/SOA audit logs and visible to anybody. Unlike Oracle SOA 11g, Oracle SOA 12c provide a easy feature to encrypt this sensitive data. To demo, we will create a dummy XSD with two elements i.e. Emp Name and SSN. The composite simply take the Name/SSN as a input and save the data in table. For saving the data in table I just created a DB adaptor. In most of scenario, you might end up calling another system. If we run this simple composite by passing some data, and if we look for the soa instance in EM console, the SSN will be clearly visible. Below are the steps to apply the message encryption from JDEV: 1. Open the composite in JDEV.

Passing/Receiving HTTP header in SOA BPEL

Image
In this example we will explore how to pass or receive the parameters from HTTP header. We will explore below two scenarios, To receive the HTTP header from SOAP request. To pass the HTTP header while calling soap service. SOA version used: 12.1.3c To receive the HTTP header from SOAP request: First we need to add the property “oracle.webservices.http.headers” under binding.ws in Service element in composite.xml. This property contains the comma separated parameters that we are expecting in request. Example,  ENV,VERSION. <binding.ws port="http://xmlns.oracle.com/SOA_Learning/HTTPHeader/HTTPHeaderTest#wsdl.endpoint(httpheadertest_client_ep/HTTPHeaderTest_pt)">          <property name="oracle.webservices.http.headers">ENV,VERSION</property> </binding.ws> Now in BPEL source under receive activity, we need add <fromProperties> element which will copy the parameters from HTTP header to BPEL variable.

Configuring REST service in SOA using HTTP Adapter - GET/POST

Image
In this example, we will explore how to configure REST service in SOA for both GET and POST request. For this example, we will create a XSD which takes firstname and lastname as input and returns Full Name as output. First, we will create a new project call, RestNamingService. Our XSD will look like below: <?xml version="1.0" encoding="windows-1252" ?> <xsd:schema xmlns:xsd="http://www.w3.org/2001/XMLSchema" xmlns="http://www.example.org"             targetNamespace="http://www.example.org" elementFormDefault="qualified">   <xsd:element name="request">     <xsd:annotation>       <xsd:documentation>A sample element</xsd:documentation>     </xsd:annotation>     <xsd:complexType>       <xsd:sequence>         <xsd:element name="firstname" type="xsd:string"/>         <xsd:element name="lastname"

Oracle SOA suite Packaging

Image
In this post we will go through some basic steps to automate the daily tasks i.e. compilation and deployment of SOA projects. In order to deploy the SOA projects on server we usually follow below two approaches: 1. Compile and Deploy using JDEV 2. Compile and Export the SAR using JDEV. Deploy using EM console. The above is adopted in development phase. In testing and production we need to automate this deployment activities in order to avoid any human error. SOA suite provide us the ANT scripts to perform this tasks. This same scripts are used by JDEV to perform the task like deploy/compile etc. We will now go show the steps to use some basic commands: I am using Oracle SOA 12c environment. Pre-requisites: Configure the ANT_HOME, JAVA_HOME and PATH variables.   1.    ANT_HOME = (MIDDLEWARE_HOME)\Middleware\Oracle_Home\oracle_common\modules\org.apache.ant_1.9.2.    PATH=%PATH%;(MIDDLEWARE_HOME)\Middleware\Oracle_Home\oracle_common\modules\org.apache.ant_